- Open the Recorder using the provided QR code
Open the Recorder application and scan the QR code.
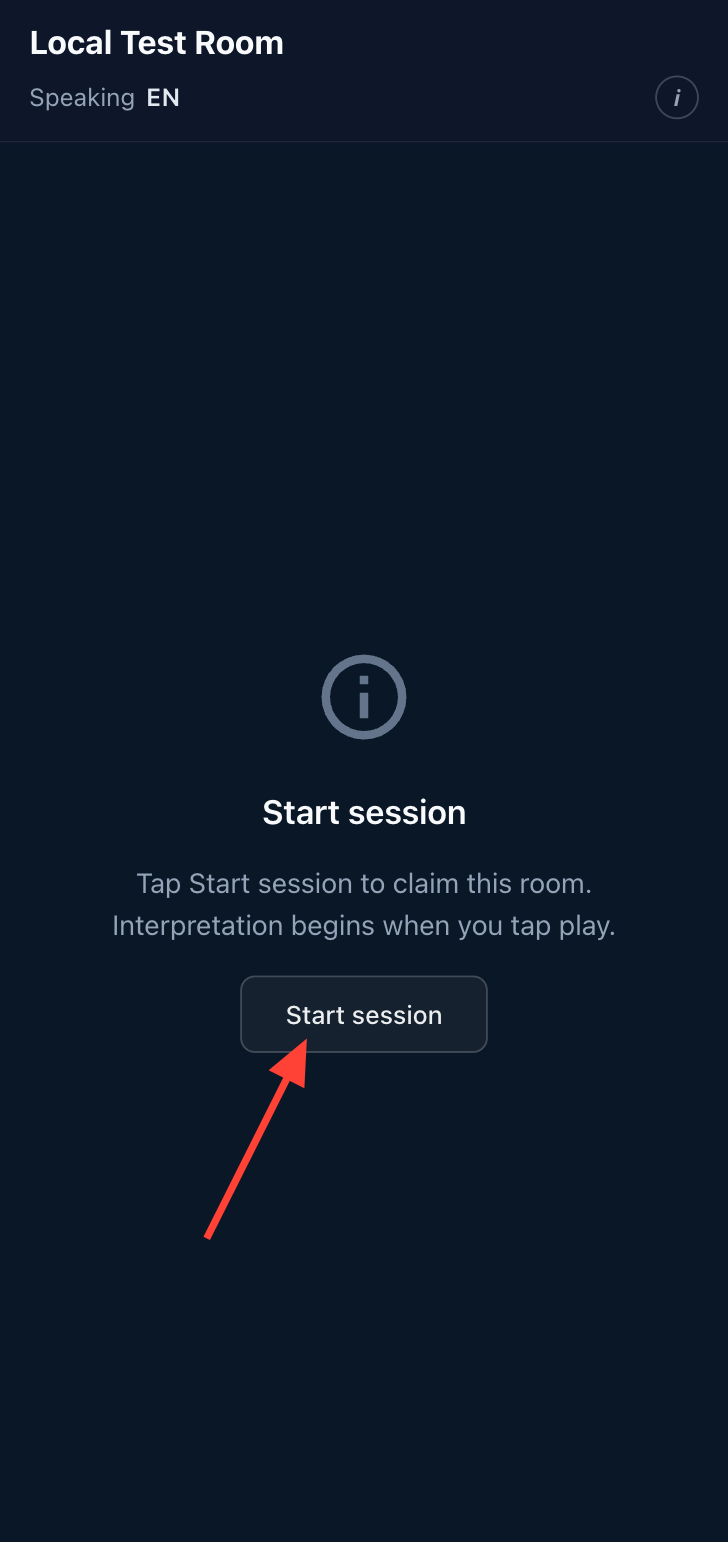
You will see the room name and the default meeting language. - Start a new session
Click the Start Session button to enter the configuration wizard.
- Enable the microphone and select input device
Click Enable Microphone.
Select your input device from the list (e.g., phone microphone, tablet microphone, or USB sound card such as ATR2x).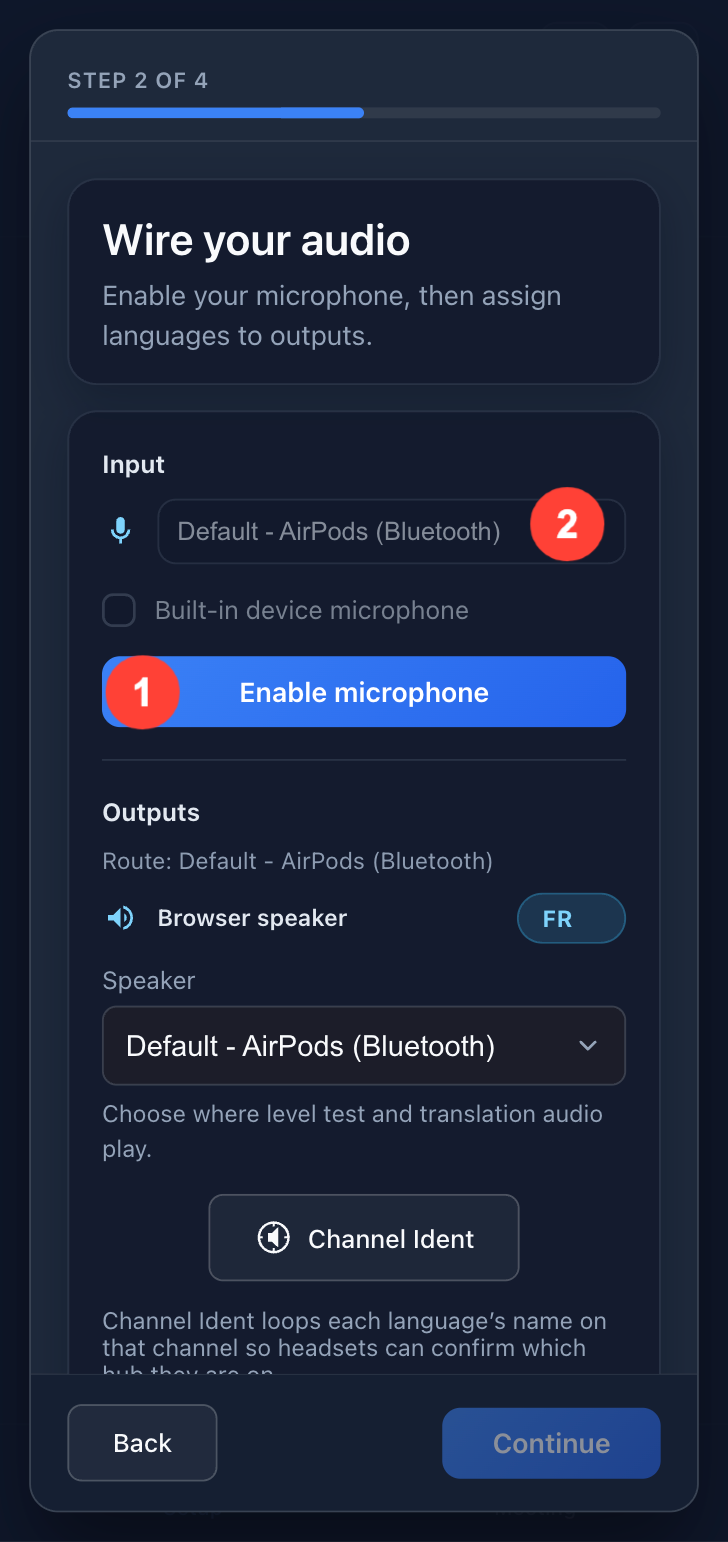
- Select output device and language (optional)
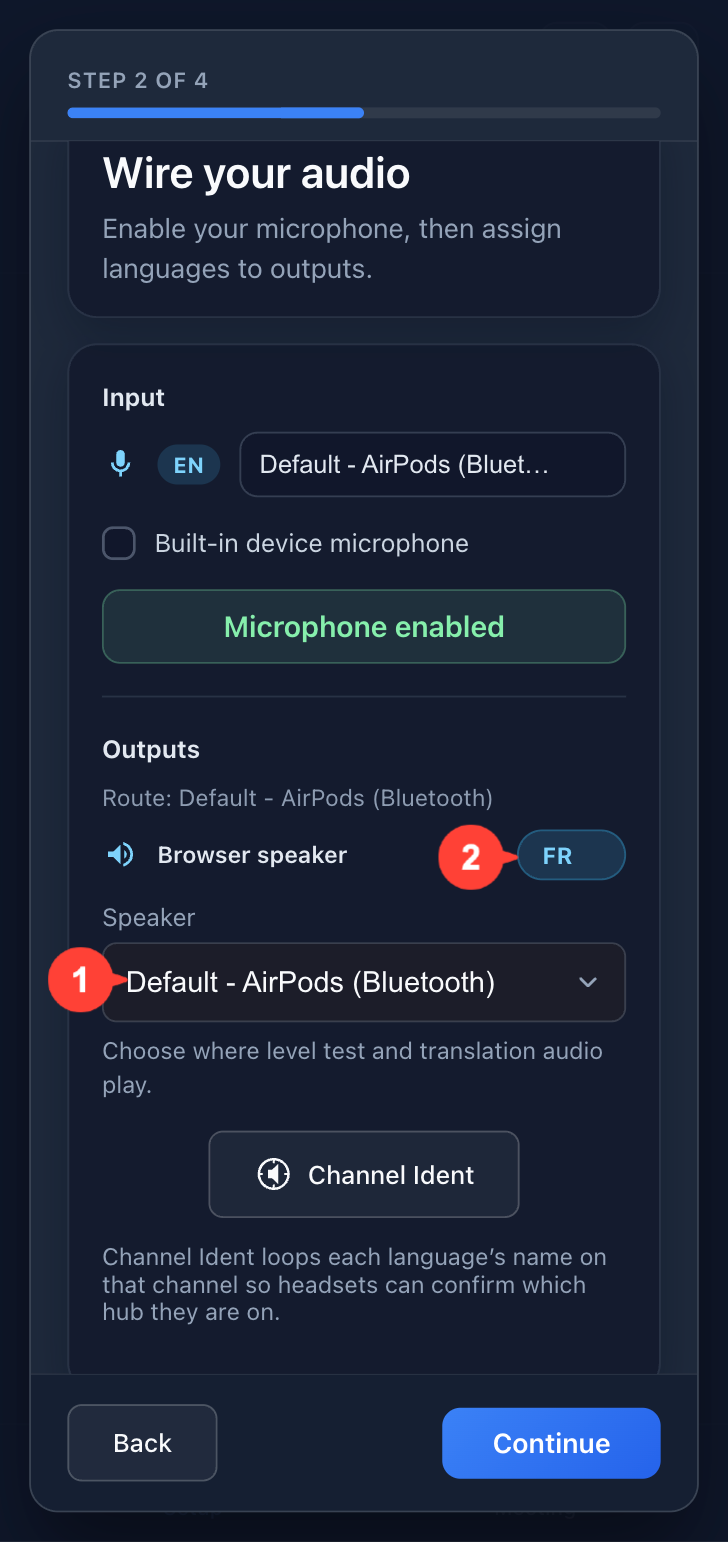
- Select your output device.
- Click the language next to Browser Speaker and choose the desired language (e.g., French).
If using a USB sound card, select it as the output device.
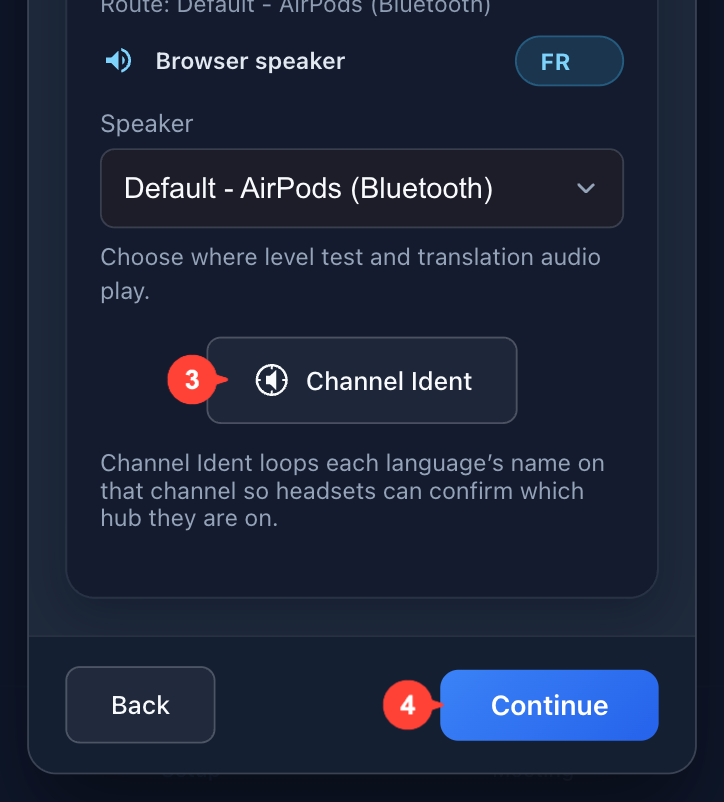
- Verify output speaker with Channel Identification. Click the Channel Identification button to play a looping native-language audio sample. This helps confirm your output speaker and language selection are correct.
- Click Continue when ready to proceed.
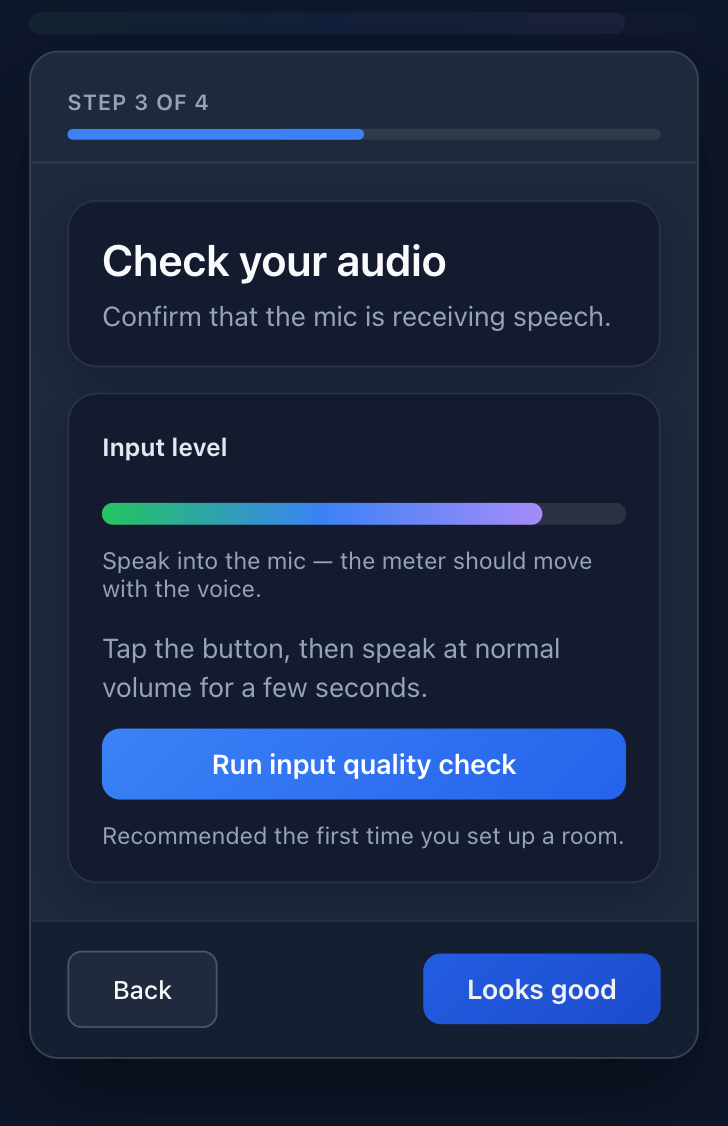
- Check audio quality using the audio level meter
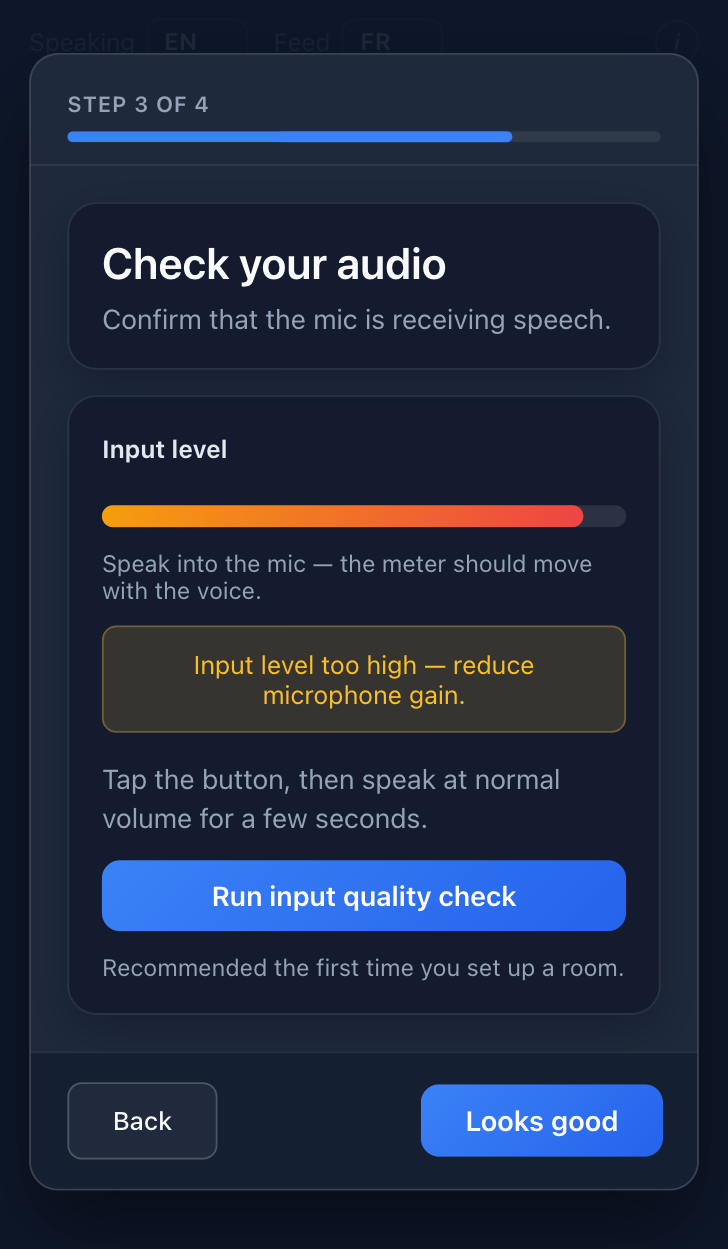
This step helps you ensure the device is receiving a clean audio signal that will be easy to transcribe and translate. Observe the audio level meter. Loud input shows clipping; if the meter is low, your input level is too low.
- Run the input quality check
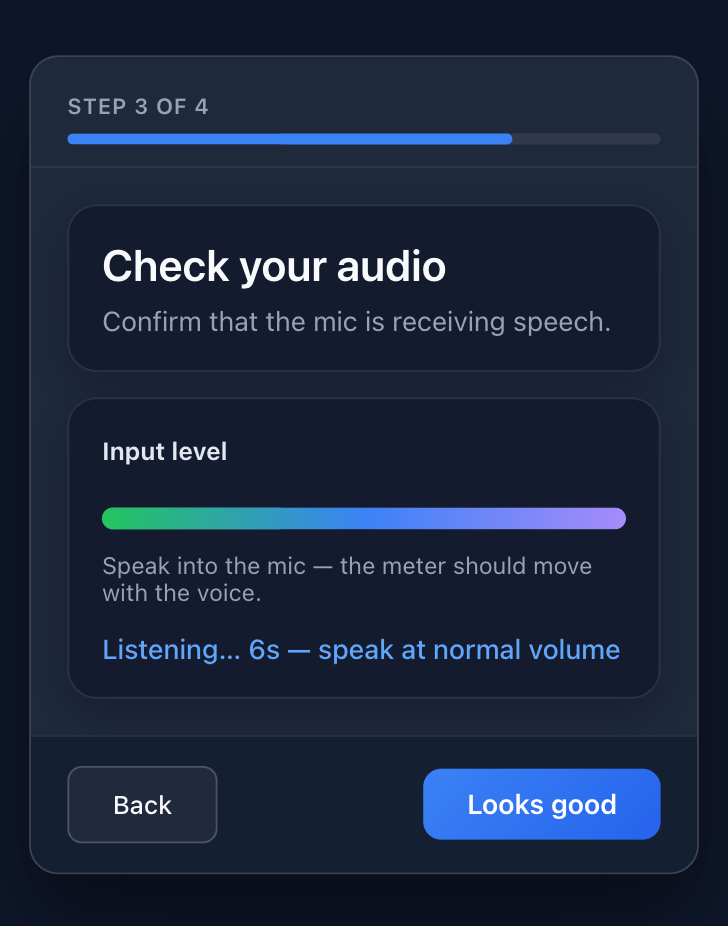
- Click Run Input Quality Check. Speak at normal volume for the six-second recording.
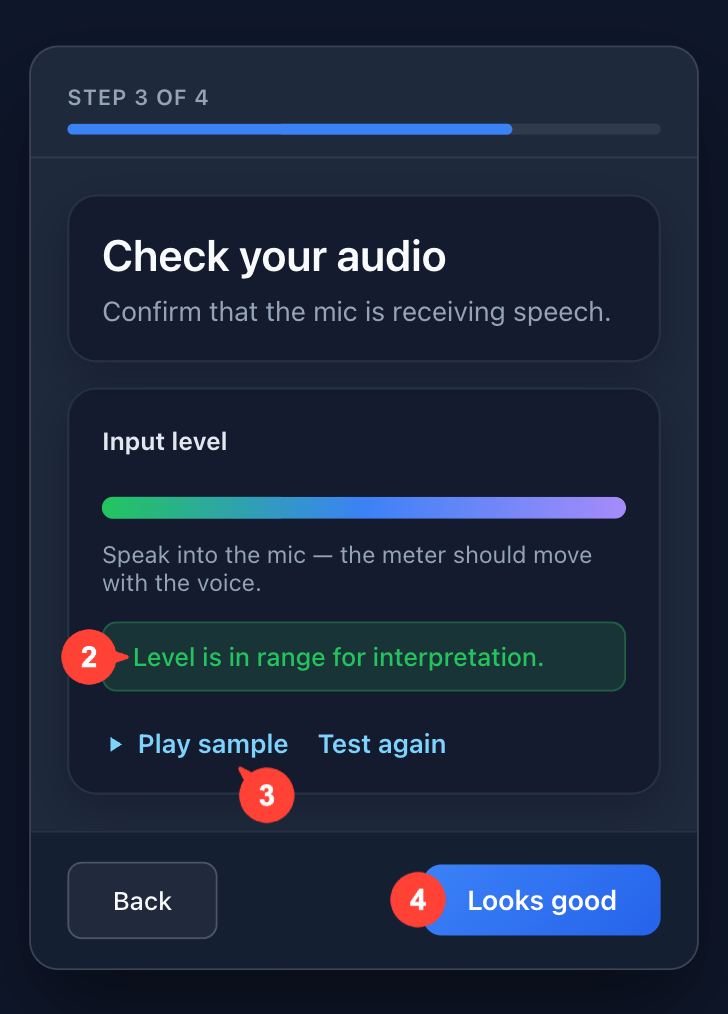
- If the level is not judged to be in range for interpretation, you may need to increase or decrease the decibel level of the audio source coming into the device. If you are using an attenuator you may have the option of increasing or decreasing the amount of dampening that is applied. For example, you might change the setting from -30dB to -20dB if the audio is too soft.
- Click Play Sample to hear what the microphone captured.
- If you are happy with the audio input settings click Looks good.
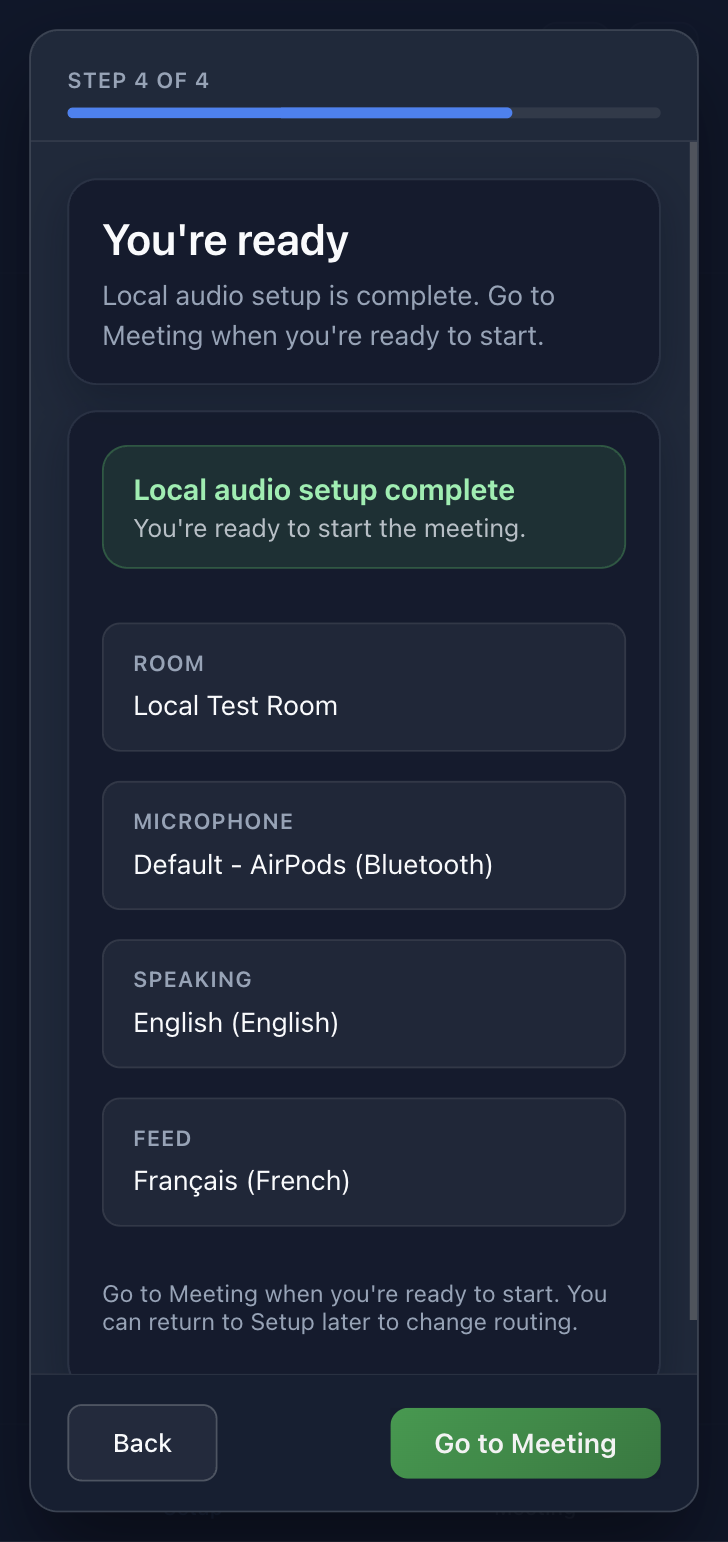
- Finalize configuration and start the meeting
Review the summary, then click Go to Meeting to begin.
Configuring the Recorder
Updated on
0 Comments
Add your comment